
Screen printing is a fascinating art form that has been around for centuries, but it’s still widely used today for everything from t-shirts to posters to packaging materials. It’s a versatile printing process that allows for a wide range of designs and colors, making it a popular choice for artists and businesses alike. However, the process can seem complex and intimidating, especially if you’re new to it. That’s why we’ve put together this guide to help demystify the process and show you how it all works, from the initial idea to the final printed product. Whether you’re a seasoned screen printing pro or just starting out, this guide will give you a better understanding of the process and help you create beautiful, high-quality prints that will stand the test of time. So, let’s dive in and explore the world of screen printing!
The Equipment Needed for Screen Printing
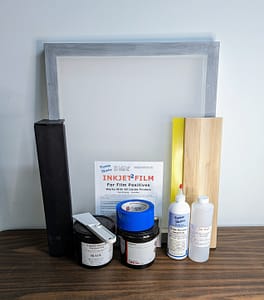
The first step in the screen printing process is to gather the necessary equipment. The equipment needed for screen printing includes a screen, a squeegee, ink, and a printing press. The screen is typically made from nylon or polyester mesh, which is stretched over a frame. The frame can be made from wood or aluminum and comes in various sizes. The squeegee is used to push the ink through the mesh and onto the substrate. Ink is available in a variety of colors and types, including water-based, plastisol, and discharge ink. The printing press is used to hold the screen in place while printing.
Preparing the Design for Screen Printing
Once you have gathered the necessary equipment, the next step is to prepare the design for screen printing. The design can be created using various tools, such as Adobe Illustrator or Photoshop. The design should be created in black and white, with each color on a separate layer. This will make it easier to separate the colors when creating the screens. Once the design is complete, it is printed onto a transparent film using a inkjet printer. The film is then used to create the screens.
Choosing the Right Materials for Screen Printing
Choosing the right materials is essential to achieve the desired results. The substrate, or material being printed on, can be anything from t-shirts to posters to packaging materials. The type of ink used will depend on the substrate being printed on. For example, water-based ink is best for printing on cotton, while plastisol ink is best for printing on synthetic fabrics. The mesh count of the screen will also depend on the design being printed. A higher mesh count is best for printing fine details, while a lower mesh count is best for printing larger areas. Read more here about the tools you will need.
The Screen Printing Process Step-by-Step
Now that you have gathered the necessary equipment, prepared the design, and chosen the right materials, it’s time to start the screen printing process. Here’s a step-by-step guide to help you get started:
1. Stretch the mesh screen over the frame and secure it in place.
The easiest way is to get already stretched screen. You can stretch your own screen with a mesh, but that requires glue and a way of stretching the mesh to desired tension. This can be done using stretching clamps.
2. Apply emulsion to the screen and let it dry.
Emulsion is best applied using a coater. There are many types of emulsion and it can be intimidating to choose one. Read more here.
3. Place the film with the design on top of the screen and expose it to light.
Best light is the sun, but you can use fluorescent or other light source. Make sure to expose the screen for the right time. Follow emulsion manufacture’s instructions.
4. Rinse the screen with water to wash away the emulsion and reveal the design.
Use a spray hose or power washer.
5. Place the substrate on the printing press and apply ink to the frame.
Choose the right ink for your project. Most popular are plastisol and water-based inks.
6. Use the squeegee to push the ink through the mesh and onto the substrate.
Typically a squeegee is made of polyurethane or rubber with wooden or aluminum handle. Read more here.
7. Lift the screen and repeat the process for each color in the design.
Apply every color separately. It is easiest if you are printing with just one color. Otherwise you will need multiple screens.
8. Heat cure the ink to ensure it adheres properly to the substrate.
Use a heat source to cure the ink. This can be done with heat gun or a flash dryer.
Common Mistakes to Avoid in Screen Printing
Screen printing can be a complex process, and there are some common mistakes that beginners often make. One of the most common mistakes is using too much ink, which can result in smudging and bleeding. Another mistake is not properly aligning the screens, which can cause the design to be off-center. It’s also important to choose the right mesh count for the design, as using the wrong mesh count can result in a blurry or distorted print. To avoid these mistakes, it’s important to take your time and practice the process before starting on a larger project.
Tips for Achieving the Best Results in Screen Printing
To achieve the best results in screen printing, there are a few tips that you should keep in mind. First, make sure that your workspace is clean and organized. This will help to prevent mistakes and ensure that your prints come out clean and crisp. It’s also important to use high-quality materials, including ink and screens. Finally, take your time and be patient. Screen printing is a process that requires attention to detail and a steady hand.
Different Types of Screen Printing Techniques
There are several different types of screen printing techniques, each with its own unique benefits and applications. Some of the most common types of screen printing include flatbed, rotary, and vinyl printing. Flatbed printing is used for printing on flat surfaces, while rotary printing is used for printing on cylindrical objects. Vinyl printing is used for printing on vinyl materials, such as signs and banners. Each technique has its own advantages and disadvantages, so it’s important to choose the right technique for your specific needs.
Applications of Screen Printing in Various Industries
Screen printing is used in a wide range of industries, from fashion and apparel to packaging and advertising.
Fashion: Screen printing is used to create custom t-shirts, hoodies, and other apparel items.
Packaging: Screen printing is used to create custom labels and packaging materials.
Advertising: Screen printing is used to create custom signs, banners, and promotional materials.
Screen printing is also used in the automotive, aerospace, and medical industries, among others.
Conclusion: The Art of Screen Printing
Screen printing is a fascinating art form that has been in use for centuries. It’s a versatile printing process that allows for a wide range of designs and colors, making it a popular choice for artists and businesses alike. While the process can seem complex and intimidating, it’s a skill that can be learned with practice and patience. By following the steps outlined in this guide and keeping these tips in mind, you can create beautiful, high-quality prints that will stand the test of time. So, whether you’re a seasoned screen printing pro or just starting out, embrace the art of screen printing and let your creativity shine!
